Category Archives: Letterpress

Star Card Valentine!

I really do spend way too much time watching crafting YouTube videos, and not enough time actually making crafty things. This weekend I decided to change the paradigm. Well, maybe not exactly. I saw an excellent video from Treasure Books on making a Christmas star card. It was beautiful! I thought I could use some of my junk journaling supplies and do a Valentine’s Day star card, so I did.

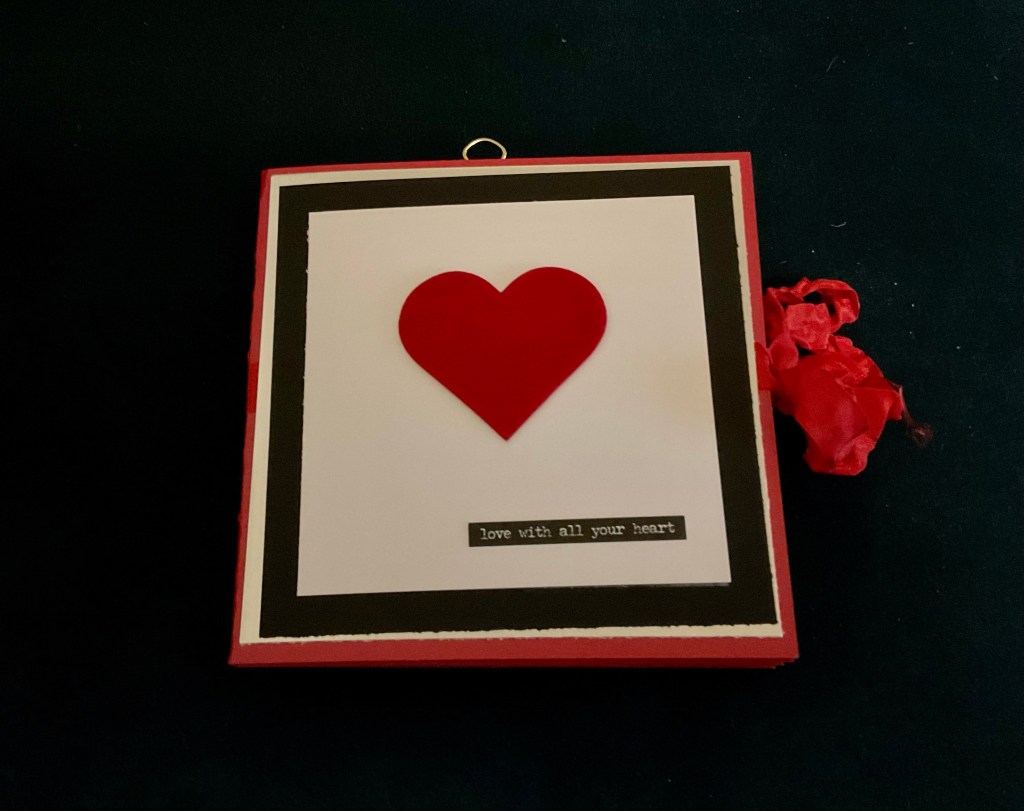
The front cover is layered paper with a felt heart I cut out of a little jewelry bag. I used seam binding for the closure and added a pink polka dot binder clip to use when it is opened up.

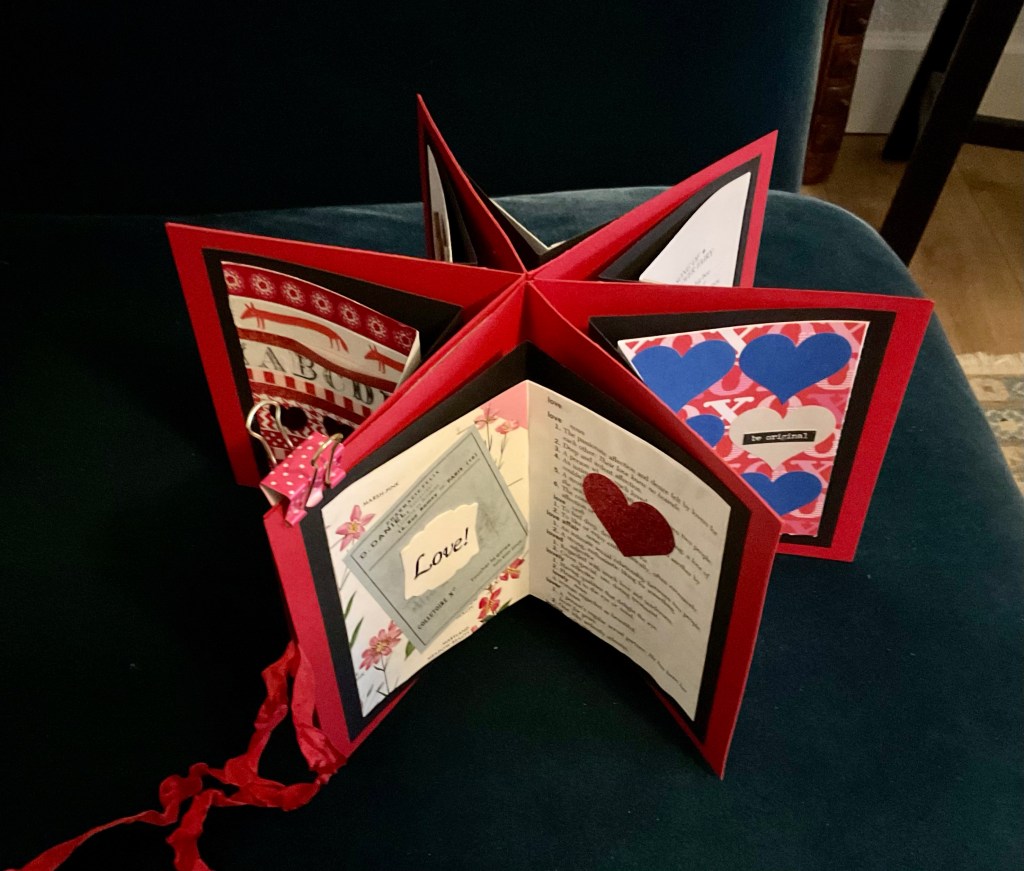
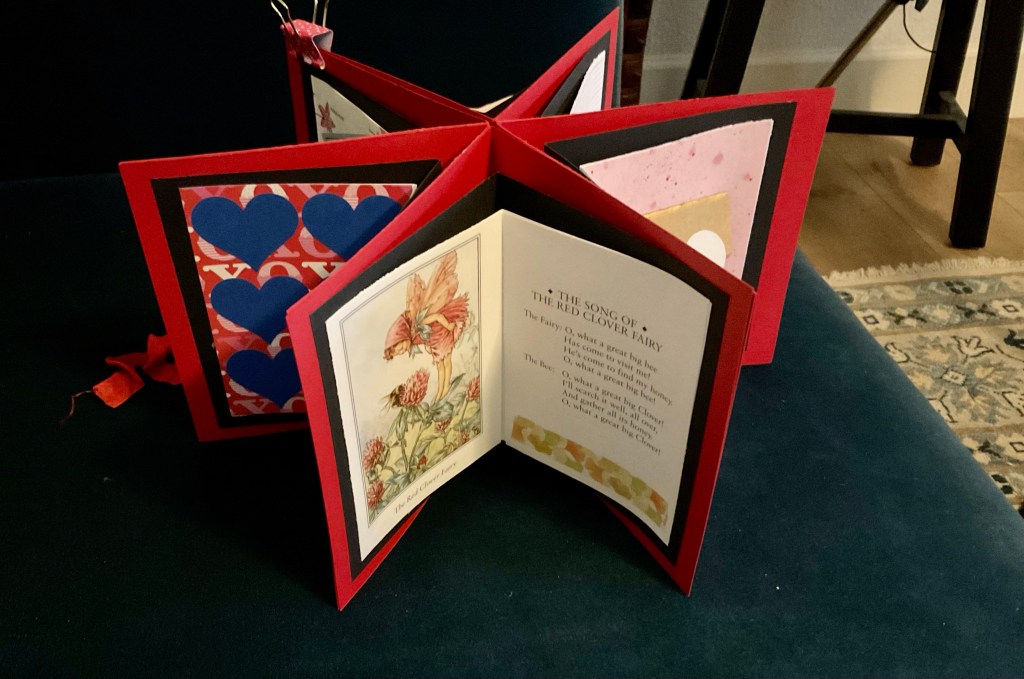
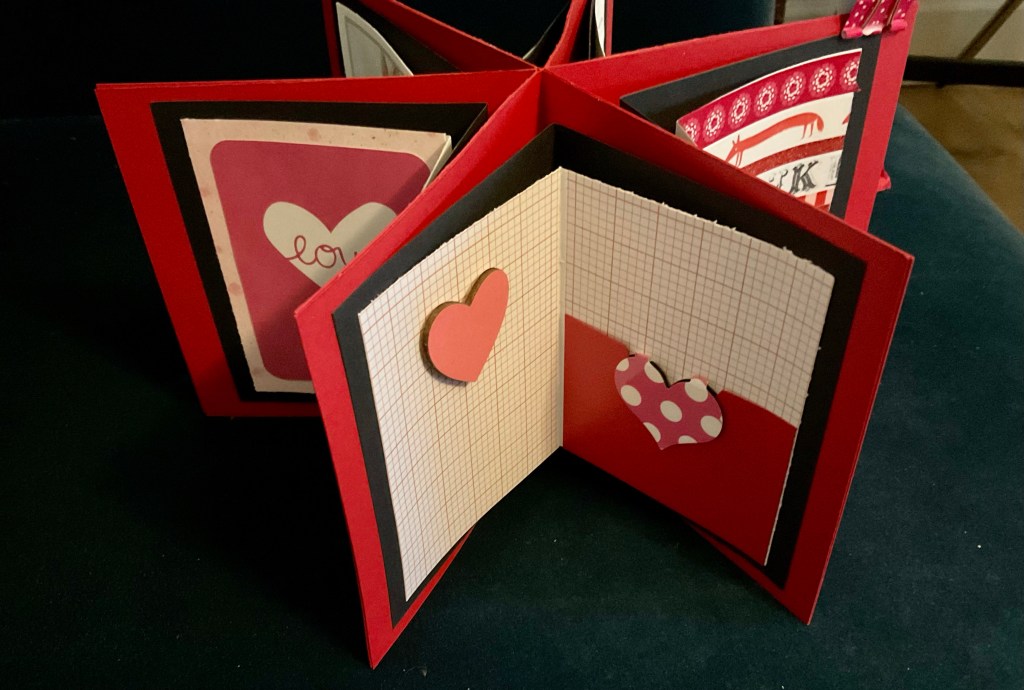
For the first section, I used a wildflower field guide page, a faux ticket and a letter pressed tag that says love. I added a thesaurus page with the word love and a glitter heart. The next section was made with scrapbook paper and a bunch of heart cut from scraps. I’ve had those hearts forever (and I still have a million more). The third page includes “The Song of the Red Clover Fairy” from the Flower Fairy collection. Section four is more scrapbook paper, a project life card and a small gold envelope with a matching card. The fifth page is red graph paper with a wooden heart and a handmade pocket. I added a magnetic heart page marker. The final page is various washi tapes and heart stickers.

This was a super fun project as I got to be creative with all the odds and ends I had in my craft room.

Star Card Valentine Cover
Page 1
Page 2
Page 3
Page 4
Page 5

Page 6
Advertisement

Thnaks!

Long ago I worked for a man named Jim.  He was an awesome boss.  He gave good feedback, was supportive, mentored me and was an all around good guy.  He did have one fault, though.  He was not the best typist; I think he typed too fast.  Especially the word thanks.  I think he typed it correctly only 25% of the time.  I have to admit, I have the same problem.  The newer email systems have better auto correct and error notifications.  So my fond memories of “Thnaks!” and “Thansk!” are just that, memories.  To all the young professionals, I hope you have  a Jim for a boss at least once in your career.

Humorous Thank You Card,  hand pressed on a Kelsey Excelsior
Humorous Thank You Card, hand pressed on a Kelsey Excelsior

New Toys for the Long Weekend!

Yesterday I got a beautiful white box filled with fun.  I ordered a button maker off of Easy from Button Boy Inc.  This cool machine makes various types of buttons and badges, also known as flair.  I was so excited that unpacked it before I did anything else.  My box included the Tecre one inch button maker, a paper punch to get the graphics the right size and all the supplies to make 1000 flat backed buttons/badges.  I was a bit disappointed because the box did not include the magnets I ordered.  I sent off a quick email – so we will see how the customer service is at Button Boy.

I am still getting the hang of using the button maker, but the process is quite easy.  Choose an image and punch it out.  Try to get the main part of the image in the exact center of your circle.  Then place a shell in the little well on the machine, cover with the graphic, add a thin mylar (plastic) sheet, turn and press.  In the other well, add your back.  This is the part that my magnets were needed.  I bought magnets that can fit into the back.  This way you have a magnet enclosed in your button instead of sticking out the back.  I’ll have to let you know how it goes once I get the magnets.  After you have pressed the graphic part, swivel the die around and press the back onto the first piece.  And you are done!  Quick and easy.

Once I get my magnets, I will add a blog with a picture.

In the meantime, I am still all about the cards-in-a-box.  I made a birthday card and liked it so much, I made a second one with a different sentiment to send to my mother-in-law!  This was made with Accucut dies and a couple of regular Bo Bunny buttons.

Die Cut Flowers - Card-in-a-Box
Die Cut Flowers – Card-in-a-Box

Memorial Day Fun

Last weekend was absolutely beautiful.  So  we spent a lot of it walking around town checking out all the cool houses.  I walk a lot slower than my husband, so he needs to have something to look up on his phone while we walk.  So every cool house gets looked up on Zillow – the square footage, number of rooms, bathrooms, when it was built and anything else listed.  I try to guess the price and am never right.

On Monday, after our walk, I thought I should make something patriotic.  So I pulled out my vintage heart flag letterpress block and got to work.  I pressed the heart in blue ink on white Lettra Crane cotton paper.  I used Sizzix nested squares to cut out the flag, red mat and window.  I really liked how they turned out.  Hope you like it!

Patriotic Heart Flag Card

Card-in-a-Box!?! Very Cool

As I have said at least a million times, I love die cuts!  There is just something wonderful about taking a plain card or a box die, choosing just the right paper and rolling it through the Accucut Grande Mark or Sizzix Bigshot.  You have the perfect base to do something incredible.  Or sometimes you really miss the mark and have to start all over.  And you can, because you have the die cut.

I used to send all my flops to my mother.  She didn’t care what the card looked like, she was just happy to hear from me.  She passed away a few years ago, and my pile of flops has grown.  Every time I create something that isn’t quite right, I think of my mom.  Weird, I know, but at least there is something positive that comes out of these flops!

My newest die is for a card-in-a-box.  It has all the cut and score lines, so you don’t have to measure a thing.  I also recently got a Sizzix thinlets die set with coordinating stamps.  The flowers in the set are lovely! I used Copic markers to hand color each of the flowers, the bees and ladybugs.  The happy birthday sentiment was letterpressed with purple ink.

This card certainly wasn’t a flop; my mother would have loved it.

Spring flowers burst out of this card-in-a-box!

Letterpress Sunday

I recently bought an antique 8 x 12 letterpress machine.  It is a beautiful 1881 Golding Jobber #6.  To get it going you push the fly-wheel and then use the foot treadle to keep it going.  It is 1200 pounds of cast iron and she works like a dream.  It is amazing how well this is built.  My press is similar to the one below:

Letterpress
Letterpress

On Sunday my friend Rachel and I put it to good use.  We hand set type, used my die cutting machine to cut out A1 sized cards, locked up the chase, inked the plate and made some cards.  We had a great time playing with my toys!

Choose your own themed card

Say Thank You with Style!

My friend’s daughter is getting married in two weeks!  I made cute boxes for her bridal shower and I am making little thank you notes to go with the wedding favors.  Each guest will get a stemless wine glass with the couple’s initials in gold.  I thought a note in the glass would look great.  To make the gold lettering stand out, I made a silver-grey envelope for the thank yous.  The cards are a light blush cardstock, with thank you pressed into the front.  I tied twine with a gold strand across the top.  The inside is layered gold and shimmer white.

The overall look is very elegant and simple.

Letterpressed Thank You Note

Inside of the thank you note

Tasty Treats from the Heart

Valentine’s Day will be here before you know it.  Remember when we were little and gave every kid in our class a Valentine?  Why stop now, just because we are adults?

This year I made little treat boxes that are just under two inches. I am still trying to decide what to put in them.  More likely than not, it will be something chocolate. Yum!

Letterpresses Treat Box

image

First I used my letterpress to print the word love on thick cotton cardstock.  Used a punch to cut out the label and used my Accucut Grande Mark die cutting machine to cut out the box.

Penny Farthing for Your Thoughts?

I love the weekend!  This is when I get to be creative and use all my crafting toys. Last night I decided to get dirty…

That means Letterpress!  Letterpress is dirty work because you have to get inked up.  First you scoop out ink with you ink knife.  You work your ink a bit with the knife and then dab it on the letterpress ink disk.  The letterpress rollers go over the disk to collect a thin layer of ink and then rollover the blocks and letters to deposit the ink.  I can not do this process without getting ink all over me, no matter how hard I try.

So what did I make?  Cute mini notecards with an ordinary bicycle (AKA old fashioned bicycle or a penny farthing).  The cards are 2.25 by 2.25 and are printed on Lettra cotton cardstock with brown black ink.  I then made mini envelopes to match out of craft colored card stock.

Mini notecards with a cool letterpressed penny farthing bicycle

Penny Farthing mini note with envelope

Happy New (Letterpress) Year!

I hope you have a wonderful 2015!  I know I will, because I will be making time to do the things I love; spending time with my husband, snuggling with the dog and crafting.

Earlier in 2014 I bought a Kelsey Excelsior 5 x 8 letterpress machine.  This antique machine was made sometime between 1893 and 1928, based on the patent number.  How cool is that!  I have vintage printing blocks and several alphabets for pressing images and words.  I am still learning how to use it, but I am hooked.

Kelsey Excelsior Letterpress Machine

I was lucky enough to have five days off over Christmas, so I played.  I made a bunch of little note cards that said:

  • Hello
  • Hola
  • Ciao
  • Bonjour

International Hello Letterpress Notecards

I used Crane Lettra cotton cardstock and a midnight blue ink.  Next step, send all my friends a card!

I would love to hear about projects you are working on; leave a comment and let me know!