Tag Archives: Scrapbooking

Star Card Valentine!

I really do spend way too much time watching crafting YouTube videos, and not enough time actually making crafty things. This weekend I decided to change the paradigm. Well, maybe not exactly. I saw an excellent video from Treasure Books on making a Christmas star card. It was beautiful! I thought I could use some of my junk journaling supplies and do a Valentine’s Day star card, so I did.

The front cover is layered paper with a felt heart I cut out of a little jewelry bag. I used seam binding for the closure and added a pink polka dot binder clip to use when it is opened up.

For the first section, I used a wildflower field guide page, a faux ticket and a letter pressed tag that says love. I added a thesaurus page with the word love and a glitter heart. The next section was made with scrapbook paper and a bunch of heart cut from scraps. I’ve had those hearts forever (and I still have a million more). The third page includes “The Song of the Red Clover Fairy” from the Flower Fairy collection. Section four is more scrapbook paper, a project life card and a small gold envelope with a matching card. The fifth page is red graph paper with a wooden heart and a handmade pocket. I added a magnetic heart page marker. The final page is various washi tapes and heart stickers.

This was a super fun project as I got to be creative with all the odds and ends I had in my craft room.

Star Card Valentine Cover
Page 1
Page 2
Page 3
Page 4
Page 5

Page 6

Long Forgotten Items

A million years ago, I bought a box of blank cards and envelopes by My Mind’s Eye, the Union Square set. Beautiful, thick, glossy cards patterned with creams, dark orange, and grey. And there they sat for years. They moved with me to the Pacific Northwest and moved back to the desert Southwest. I think they may have been a bit sad being tucked away in the craft room closet. But today was their day!

I recently purchased the Spring Critters stamp and die set from Close to My Heart and thought the images and sentiments would be perfect for a quick card for my work colleagues. Since I was crafting on my lunch break, I wanted to make the cards simple, but I wanted them to be cute too.

Hello there, Mr. Fox!

I punched a 2.25 inch circle out of olive green card stock from LCI Paper and glued it on to the card front. Used the fox stamp with the “hello there” sentiment and a bit of water color pencils to make the image pop a little. I mounted the image on foam squares to add a bit of depth.

Quick, easy and cute!

In Sympathy

One of my colleagues had a death in the family this week, and my heart goes out to her. I wanted to let her know I was thinking of her, so I put together this simple sympathy card.

Simple Sympathy Card

I used a lilac base and layered white card stock on purple. To add a little texture I tore the edges. I used the calla lily stamp from Stampin’ Up’s retired Long Stemmed set. There are two lilies on the white piece, with a third lily that I fussy cut and put in place using foam dots. I used water color pencils to add a little color and finished it off with a bit of cream satin ribbon.

I hope this card can brighten my friend’s day a little.

Crafty Journaling

Since the end of March, I have been working from home and basically never leaving the house. My husband has been working from home for 10 years or longer, so he thinks everything is normal. We all know everything is not normal. I have watched everything on Netflix and Amazon Prime, so I need to get back into doing other things. One of those other things is to get more active and watch what I eat. To go along with that, I decided to journal a bit with goal tracking. For me, I want a pretty journal, so I have been doing some art pages.

Continue reading Crafty Journaling

Puppy!

Totally not Craft related, but totally cute!


How could you not love this!

So what crafty thing have I done lately?  I played with my W R Memory Keepers Alphabet Punch Board and Banner Punch Board. I bought both of these a while ago, but really never used them. We needed a thank you banner at work, so I thought this was the perfect opportunity to use some of my stash.  

The Alphabet board is really easy to use and comes with a booklet with pictures of each step in making all the letters and numbers.  I still made a backwards S as I wasn’t paying close enough attention.  The letters a 5″ tall and looked great on the banner we made.


Butterflies

I think postage stamps are pretty cool.  I am not a collector by any means.  Before I went on my self imposed moratorium on buying craft supplies, I bought a few stamp lots on Etsy.  One included several beautiful butterfly stamps.  So I made some cards with them (I know that is a big surprise for those that know me).  


At least ten years ago I went to a scrapbooking convention in Mesa, Arizona.  There was a booth with a great deal on paper.  A bought about twenty packs of 8.5″ by 5.5″ paper.  Perfect for quick cards.  So, in line with my theme for the year of using what I have, I didn’t buy anything for these cards.  Yay me!

Pretty Paints

I just went to Craft Warehouse and bought a ton of new, cool stuff!  That got me thinking that I already have a lot of cool stuff.  So I decided to give myself a challenge.  That challenge is to use only the things I have for the next year.  This will probably be impossible for me, as I have an addiction to crafting toys.  So I will need your support!  Here’s my pledge:

  • No new paper
  • No new die cuts
  • No new stickers
  • No new stamps (sorry to my Stampin’ Up demonstrator)
  • No new crafting toys
  • Make a project a week with my current stash

So my first project will be starting an art journal with the cool paints I bought today. 

Art Journal Supplies

I have no idea what I am doing here, so it’s off to YouTube to figure it out!

Little Boxes, Made of Ticky Tacky

I never rally watched the show Weeds, although I have seen a couple of episodes.  I never got into it like my former boss did.  She loved that show.  Something about selling weed in the suburbs didn’t resonate with me.  But, and there always is a but, I did like the theme song.  Little Boxes by Malvina Reynolds.  It is just a little song about the suburbs and the houses “they all look just the same.”  Maybe that is not great for houses, but it is great for treat boxes.

Last year a put up my pretty dress boxes. Last night I got a request to make some boxes in different colors.  So I did.  So just like the little boxes, there is a red one, a blue one and a silver one, the all look just the same.

Dress Boxes

Not really the best picture, but it gives you a good idea of what the boxes look like in different colors.  Kind of cute, right?

Hope you have a wonderful week!

Button Maker, Baby!

So my husband knows I have a new button maker.  He works from home, so he got the package when it came.  The good news is that I cleaned up my craft room before the button maker was delivered, so he wasn’t too mad.

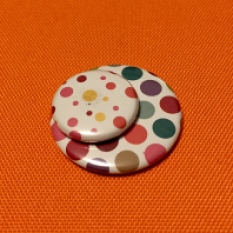
Buttons are really quite easy to make. Pick a pretty paper, or stamp something, or use a picture, whatever you want.  Punch out the appropriate sized circle.  The circle must be bigger than the finished size of the button.  I have punches that coordinate with the button makers, so no guessing for me.  The button is made of four pieces.  The shell, which is the backing for the top of the button, a back, the pretty paper and a mylar cover. I like to make magnets, not pin backed buttons, so I have a fifth piece, a magnet set between the shell and the backing.

The Tecre button makers have two wells and a press:

Button Makers

This picture shows both my 1 inch and my 1.5 inch button makers.  You can see one of the wells, and the other well is hidden under the press.  In one well you layer a shell, then the pretty paper on top and the mylar on top of that.  Once you have the shell and paper set, you press it in the machine.  In the second well, you place the back.  If you are making a magnet, you put the magnet on top of the back.  The start of your button is in the machine, then you swivel around the backing, press again and out comes your button.   It is so easy to to and the results are fabulous!

Here is a quick YouTube video I found that shows how these button makers work:

Now I am going to go play with my new toys. Let me know if you would like me to make you any button magnets!